


2025 Jayco Jay Flight SLX 210QB Full RV Demonstration
See how the 2025 Jayco Jay Flight SLX 210QB operates with this complete RV demonstration from Hilltop Camper & RV.
Read the Full Video Transcript — 2025 Jayco Jay Flight SLX 210QB
2025 Jayco Jay Flight SLX 210QB — Full Transcript
Read the complete Hilltop Camper & RV walkthrough of the 2025 Jayco Jay Flight SLX 210QB, including exterior storage, stabilizers, towing components, water and waste systems, awning operation, interior controls, kitchen and bathroom features, sleeping areas, entertainment, electrical equipment and owner-operation basics.
Equipment and safety note: The complete spoken transcript is preserved below. Safety/context notes are added where the video discusses equipment or procedures that can vary by RV or involve propane, towing, waste systems, shore power, roof access, electrical equipment or propane-fired appliances. Always verify procedures, capacities, ratings and maintenance intervals in the manuals for the exact RV and installed components.
0:06 [Music] [Applause] So, I'm going to go around the outside of the camper first, show you how that all works, and do the same thing on the inside. Um, we'll start right here with the door and your steps. So, they're the nice Lippert Solid Steps. They're going to flip up into the door for travel with a latch right here, so you don't have to worry about latching it up. Um, when we're at the campground and want to pull this down, we just got this latch that pulls straight
0:33 out, steps are going to flip down. The nice thing about these is the feet are adjustable. So, no matter how unlevel the ground is, we can always have nice stable steps and they're just going to set right down there. Now, we're nice and solid there. um screen door here that just detaches so
0:55 you can have good air flow going through the camper. And the main door has a latch right here. So if you're just using the screen door, the door is not flopping back and forth and going to hit the side of the camper. So just make sure you have that latched up. Um quickly on the window, it is tinted so people aren't going to see in at you. Um, but there is a shade you can get to snap
1:19 right in here so you can have a window shade just like the rest of your windows. Um, we do have the deadbolt lock on the inside of the camper so you can lock yourself in at night. Um, and your key is going to unlock that if you have it locked in storage. Um, coming this way, we'll pop the awning out when we get inside. So, I'll show you that. Um, up here we just have your compartment door.
1:41 Um, this just brings up to a magnet. So, nice and easy to latch that up. Um, in the compartment, you're going to find your stabilizer jack crank. So, you have four stabilizers,
Safety note near 1:55 Stabilizer note: The speaker distinguishes stabilizing from leveling. Stabilizer design, allowable tools and torque vary by RV, so follow the exact Jayco and stabilizer-jack instructions.
1:55 two in the front on either side, two in the back on either side. Um, they are just for stabilizing, not for leveling. So, you want to level the camper first. Um, front to back with your tongue jack. If you have to level side to side, you want to drive up on some blocks of wood to level side to side.
2:13 Um, once you get the camper leveled, that's when we're going to go ahead here and crank these jacks down. Once they hit the ground, you just want to snug them up a little bit. Just like that. And once you have all four of them down, that's just so you have the comfort of not rocking back and forth while you're inside the camper or if you have a windy day, it's nice and stable for you.
2:41 And then they just crank back up the same way. It is a 3/4 drill bit. So if you have a a cordless drill, you can zip them up and down with the drill there. We do have a click- on light in here. That's just an LED light button right in the middle just to give you some extra light in your compartment space. You will also notice one other
3:05 crank. This one here is for your electric tongue jack up front. So, if this jack is not working for whatever reason, we can pop this cap off on the jack and crank it up and down by hand so we're not just stuck somewhere. So, hopefully you never need to use this, but you have it just in case. All right, we will make our way to the A-frame here. Um, this one is going to have
Safety note near 3:34 Propane note: This section discusses propane cylinders and an automatic changeover regulator. Propane systems vary by equipment; follow the regulator and Jayco instructions, and use qualified service if anything appears damaged or leaks are suspected.
3:34 two 20 lb propane tanks, um, filled and ready to go for you. Um, I will take this cap off. All you have to do to turn them on is twist the knob on top. So, that's going to turn them on.
3:50 And then we have the regulator here. So, it's the automatic changeover regulator. Right now, this arrow is pointing at this tank here. That is telling me it's going to draw propane from this tank first. As soon as this tank runs out of propane, if this one is already open, it will
4:13 automatically switch and start drawing propane out of the second tank. Um, personally, I like to keep one open at a time so I know when one's empty and then I physically open the second one myself. But if you have them both open, it will automatically change and start drawing propane off the second tank. Um, also up here again with the tongue jack, it's nice and easy. Just simple up and down on the
4:42 tongue jack. Um, you have a little light here if you're ever hooking up at night. And then just remember you have that crank there just in case this stops working for whatever reason. Um,
Safety note near 4:53 Towing note: This section discusses the 7-way cable, safety chains and breakaway system. Verify the exact tow vehicle, hitch, brake-controller, trailer and legal requirements before towing.
4:53 also you have your 7-way power cord. This is what you're going to plug into your vehicle while you're towing. So, you have brakes, lights, and everything you need as you're going down the road. Um, you have your two chains here that you're just going to cross and hook to the truck just for travel. And then the big thing here is the safety breakaway cable. So, this is also
5:15 going to hook to the same spot your chains do on the vehicle. And this is for whatever reason the trailer comes disconnected from the truck while you're traveling. This will yank out of this box down here and lock the brakes up in the camper so it's not just flying down the road. So hopefully that never happens, but just make sure this is hooked up to the vehicle every time you're towing. We will make our way to the off side over here.
5:49 Just same compartment door on this side. Flips up, latches on the magnet. Nothing else you have to do here. So, just pass through compartment, which is nice. Um, there's the other stabilizer jack on the other side. Um, also here you're going to have a few tags. Um, this one just showing your tire size and the recommended tire pressure. Um, this white one here, just VIN number,
6:12 also tires. And then the yellow one's also going to have VIN number. It's going to tell you what your cargo weight should never exceed. On this particular unit, it's 1,399 lbs of cargo weight, which is plenty of cargo weight there. It will also tell you how much your onboard fresh tank weighs when it's loaded full of water. So, this one does weigh 433 lbs when you're filled up
6:38 with water. So, just keep that in mind. Um, that does retract from your cargo weight. You will also have this yellow tag on the interior of the main door. As we're coming down here,
Safety note near 6:52 Waste-system note: This section discusses sewer connections, black/gray tank draining and tank flushing. Follow campground rules and the RV’s sanitation-system instructions, use appropriate protective practices, and keep potable-water equipment separate from waste-system equipment.
6:52 we're going to get to some low-point drains and your dump station. So, we'll start with dumping your tanks. So, you're at the campground. Your sewer hose is going to connect just like this cap does.
7:08 So, you're going to push the sewer hose on, turn and twist to lock the sewer hose onto the dump station. You're going to put your sewer hose into the dump station at the campground or wherever you're dumping your tanks. And then we're going to have the gray tank, which is just soapy, dirty water from your sink and shower. That's got the gray handle. It's also going to be labeled gray with the sticker. And then we have the black tank here, black handle. That's going
7:35 to be your toilet. So, what we do suggest is to dump your black tank first. So, you're going to hook your sewer hose up, make sure that's in the dump station, and then we're going to come here and pull the black handle out. That is going to dump everything from the black tank. Um, once your black tank is empty, you do have what they call up here a black tank flush.
8:02 You can hook a water hose right into here and there is a nozzle inside of the black tank that spins around from the water pressure and cleans out the black tank. So, anytime you have hose hookup at the dump station, I would personally use this just to keep that black tank clean. So, again, we're going to dump the black tank first, keep the valve open, do your tank flush for a
8:29 little bit. Once we're done with the tank flush, we're going to close the black tank back up and come here and pull the gray lever. And that's just going to dump your water. Um, again, the reason I dump that second is just because it rinses out that sewer hose after we've dumped the black tank.
8:48 While you're using your black tank flush, we do suggest you use a separate hose um other than your city water connection just because it is with your black tank. So, I'd have two hoses, one just for my black tank and then one for my city water. Um, also, and then once you're done dumping your gray, you can just push the gray closed, ready to go for the next camping trip. Um, also down here, you're
9:12 going to notice low point drains. One is red for your hot water line, one is blue for your cold water line. The main time you want to dump these is before the winterizing process, just to get all the water out of the system. Um, so those are just going to open straight up. Water is going to pour out onto the ground. You can dump them both at the same time. That works just fine. Um, and then when
9:35 you're done, you just close them right back up. One thing I do suggest is if you're done camping, you're not going to camp for a couple weeks or a month or so. I would personally come drain my low-point drains here. Um, if you let water sit in the lines, it just gets kind of stagnant and smelly over time. So draining these lines will just keep everything nice and clean for you.
9:57 We will pop up here again. This is your black tank flush for dumping your black tank. We'll close that back up. Right below is your city water connection. So, this would be for if you're at a campground with full water hookups. You can screw your water hose into here into the
Safety note near 10:13 Water-pressure note: Campground water pressure can vary. Use the RV and plumbing-component manufacturer guidance for acceptable pressure and compatible regulators.
10:17 fixture at the campground. um turn the water all the way on and you're just going to have constant water every time you flush the toilet, turn on the sink, take a shower, constant water to the camper. One thing we do suggest you use is a water pressure regulator. Um these campers can only take about 50 PSI max of water pressure. This little brass piece right here makes sure the pressure
10:42 does not doesn't get above what this camper can handle. So, I would screw this into the camper, screw my water hose off here, and now there's no worry about water pressure getting above what this can handle. I would also use this regulator when I'm doing my black tank flush. Close that back up. We do have an outside shower here. There's just hot and
11:09 cold in here. A little shower nozzle just for rinsing feet off, rinsing pets off. Um, so that's nice to have out here and that will be fed from your city water connection if you have a hose hooked up. Coming down here, this is your 30 amp power cord. It's about 30 ft long. Um, 30 amps will run everything in the camper, air conditioner, microwave. This cord here is just
11:35 going to push right on. And then it has a little coupler here you can screw on to the side of the unit just so it doesn't get pulled out if you trip over it. It's always nice and secure inside the camper. Up top here labeled KV a cabled TV input. This right here is if the campground offers cable or if you ever got a portable satellite, that's what this would hook up to. You do have an antenna
12:02 on the roof that's going to pick up local channels in most places you go to. So, you don't always need this. That is just for extras if the campground offers it or if you have the extra. Next door, this is your potable water. So, if you go to a place, a campground, a lot of state parks don't have water hookups. You can bring your own water with you. So, you can either just dump
12:30 a bottle of water in here if that's all you have to fill this up, or you can stick a hose in here, and it's going to fill up the onboard fresh tank. Um, once this tank is full, there is an overflow tube underneath the camper. The water is just going to start pouring out onto the ground so you know that it's full. There is a monitor inside that I will show you that reads empty, 1/3, 2/3,
12:54 and full. So, if you don't want it filled up all the way, you can stop it at a certain level. Um, so again, this is only for if you don't have hose hookup, you can then bring your own water with you so you can wash your hands, take a shower, flush the toilet. If you do fill this tank, there is one more drain underneath the camper here to drain the tank out. And it's the same concept
13:18 as dumping your black and gray tanks. You are just going to pull this lever and that is going to dump any water out of the fresh tank here. If you do not fill the fresh tank, you never have to worry about dumping the tank because the only way to get water into the tank is through this hole up here. But you always want to dump that when you're done. Even if you think it's empty,
13:41 pull that lever. That's just going to get all the rest of the water out of the tank there. Next up, this is just the exhaust for your furnace. Nothing you have to do here. Um, when you run the furnace, this does get hot, so be careful if you're on this side of the camper.
13:58 There is bug screens you can get that go over this exhaust. Um, they do get clogged up with bugs over time, so you get a weird smell when you start it up or, you know, it might not start up if they do get clogged up. Um, so just remember that screen you can get for the exhaust there. And last thing on this side of the camper is your tankless water heater. Um, it's really nice because it's tankless. You don't have a tank running through. You're going to get more constant
14:23 hot water like you would at home. Not much you have to do out here. There is an onoff switch. So, I'm going to turn this switch on. All this switch does is activate the panel inside the camper that I'm going to show you that turns the water temperature up and down. So, you just want to make sure this is on. The rest of it is done inside the camper, which I'll show you here in a little
14:50 bit. There is a 2 amp glass fuse here. It's a mini 2 amp glass fuse. So, if for whatever reason the water heater is not working, you can come check this fuse. Um, it's something I rarely see pop,
Safety note near 15:00 Shore-power note: This section discusses the RV’s electrical hookup. Use only properly rated, undamaged equipment and follow the campground pedestal and Jayco electrical instructions.
15:05 but if you if you're going to have this, I' I'd carry a 2 amp glass fuse just in case you're ever having issues with the water heater. This does also get hot when the water heaters on. So, again, just be careful there. On the bumper here, you do have the cap that pulls right off and then it turns into your sewer hose storage. No one wants to put their sewer hose in the front compartment or in a bin. So, you can just pop this cap off, throw your sewer hose in here for travel or
15:32 storage, and then the cap just pushes right back on. You do have the same cap on the other side of the bumper, so if it moves down while you're traveling, you can always get the sewer hose out. Um, it is prepped for a roof ladder. So, it's a ladder that you can get that just hooks on to the bracket up there. The nice thing about getting that ladder is we do suggest you get up on the
15:59 roof at least once twice a year. Um the reasoning be is you have sealant around all your vents up there. So you want to get up there and check the sealant. Make sure there's no cracks. Make sure the sealant's looking good. Also, it is a rubber roof. So over time, sunbeating down on it, the rubber is going to dry out. So there is a rubber roof wash you can do. Um, it cleans the rubber,
16:23 makes it look nice and white again, but it also has conditioner in it, so it kind of keeps that rubber from getting soft and brittle over time. So, I do suggest get up there once, twice a year, check the seals, check the rubber. Doesn't mean you always have to reseal it, but just give it a check. You are prepped for a backup camper. That's what this black plate is for up there.
16:46 Um, meaning if you do ever buy a backup camera, it's pretty much a plugandplay. So, you don't have to do all the wiring for it. Just plugs in right up there. Um, it is prep prepped for the Furion backup camper. That's the one it's ready for. Full size spare tire. Um, so if you ever get a flat, you have the full size spare tire here. The camper itself does not come with a jack or
17:10 anything to replace the flat tire. So, if you don't have AAA or anything like that, make sure you have something with you to change the flat. Um, the tire that is on the bumper is just held on with Ubolts back here, so you can move it up and down the bumper, take it off if you ever need to. And also on the back here, we do have a propane connection. It's a quick connect
17:37 propane connection. So, if you have a camping grill that has those little
Safety note near 17:40 Awning note: Wind and storms can damage an RV awning quickly. Follow the awning manufacturer’s operating limits and retract it whenever conditions are unsafe or the RV is unattended.
17:42 Coleman green propane tank bottles, you can get rid of those and get a propane hose that just connects right into here and then to your grill and that will run off the front propane tanks so you don't have to bring extra propane with you. Um, you do have to make sure it's a low pressure camping grill. That's what's going to connect to this connection here.
18:09 license plate holder. So, we'll put the license plate on there when we get that. Um, coming around to the front side before we get inside here, you do have two outside speakers. Those are waterproof. We'll fire those up when we get inside the camper. And then we have your exhaust vent.
18:27 So, for cooking inside, you have an exhaust fan. So, this is just going to make sure everything vents outside. You do have to come physically open this. So you just pull this lever down and it's open. So now you're cooking inside. We're good to go. This is something you can leave open pretty much all summer long. It's screened in. You're not going to get bugs flying inside. It's not going to fly off while you're going down the road. So you can leave that open. If you need to close it,
18:54 just pops right closed. Last thing here, we have a cable TV output. So, if you want to connect, if you're setting up an outdoor TV, you want to connect to your antenna on the roof, or if you're connected with cable on the other side, you have the output on this side here. And then we just have a couple plugins for TV or whatever else you're plugging in outside. And then on the
19:19 camper itself, we do suggest you do a bearing pack about every 4,000 miles or every 3 years or so. Um, what that is is we just replace the grease, the bearings. It just keeps everything rolling the way it's supposed to. Um, so you never have issues as you're taking long trips. So, we do have the handle. This does lift up and either go across the door for travel or lift up and go this way. Um,
19:46 just make sure it's not sticking straight out while you're traveling down the road. Otherwise, while you're camping, you just have a nice handle to go inside the unit. Yep. So, walking in the camper here, this is kind of your control panel where your first steps are going to be. We have a couple light switches. This one here is your main ceiling lights, which all the ceiling lights do have click on buttons. So, if you want to turn a few off that
20:09 you don't want with the switch anymore, you can turn them on and off by hand. There will be lights throughout the camper, too, that have either their own switch or more click on lights. And then this light switch is for the LED awning light switch that goes down the awning. So just on and off. And then you have a nice LED strip going down the awning there. Right next door labeled
20:33 awning. So it's a power awning. It's simple in and out. So we get to the campground, we want to put our awning out. We're just going to hold out and the awning is coming out. If I let off the switch, it just stops. Otherwise, we're going to keep holding it here. Comes out about 8 ft from the camper. So, once we get all the way out, you will see that flap come down and then
21:10 you see this tube here with no canvas rolled up into it. That's how you know it's out all the way. If you keep holding out with it, it is just going to roll up backwards. So,
Safety note near 21:20 Roof-access note: Roof inspection and maintenance can involve a fall hazard. Follow Jayco’s approved inspection method or use qualified RV service rather than relying on the transcript alone.
21:22 it's not going to wreck anything. It's just really not the way you're supposed to put it away. Um, so once you see the tube and the flap come down, you can let off the switch and the awning is out all the way. Um, one thing to keep in mind, if it's a really windy day, I would just roll it in because you don't want it to act as a big sail rip off the side of the camper. So, just be careful on a windy day or even if it's a perfect day outside,
21:44 but you're leaving the camper for the day, I would just roll it in so you never have to worry about anything happening to the awning. Also, here we can pitch the awning. So, if it's raining a little bit and you want water to come off one side, you can grab right here, pull down, and now the awning is pitched a little bit. So again, water can run off one side or maybe block the sun if
22:11 it's coming in at a weird angle. Um you can do the same thing on the other side of the awning. Also, um one thing to keep in mind before we roll the awning back in, we do want to make sure this bar is pushed up and nice and straight before we go back and bring the awning in.
22:35 So, coming back to the panel, we'll bring that in. You just push in for that. So, super simple. Once it hits the side of the camper, it locks itself up. So, you don't have to do any straps. It's in, ready for travel. And then last thing here is your kind of control panel. This is where you're going to check how filled your tanks are, how charged your battery is. So,
22:58 it reads empty, 1/3, 2/3, and full. So, if I click battery here, my battery is fully charged. So, we can keep an eye on that. Fresh tank is empty. Your fresh tank is the water you can bring with you. Your black tank is empty right now. That is again your toilet tank. And then your gray tank is also empty. That is just soapy, dirty water. So, you can know when you have to dump the tanks or
23:25 know when you have to fill up more water just on this tank here. You also have a water pump switch. The main use of your water pump is when you fill your fresh tank, the water just sits underneath the camper. So, you need a way to get it pumped through the water lines. So, you would just come here, turn the pump on. That's going to pump the water out of the tank,
23:49 pressurize the system. So, now when I turn on a sink or flush the toilet, I'm going to have water coming out of the fresh tank. If I am hooked to city water with my water hose, that is already pressurized. So, there's no need for the water pump. That is just for using your fresh tank. Um, couple more plugins down here. USB plugins. This right here is your propane
24:15 carbon monoxide detector. So, if you ever have a propane leak, that will go off. So, it's just a safety there. It is wired in. You're always going to have a fire extinguisher by the door. And there will be a smoke detector up on the ceiling and that is just battery powered. Coming right here, this is your thermostat for your air conditioner and
24:43 your furnace. So, it's pretty simple. It's just more of a touch screen. So, it's off right now. We're going to hit mode. Now, that is just fan. So you auto fan and then we go to cool which is air conditioner and we have it on auto fan meaning it's going to hold my temperature for me. So say 55 is my favorite temperature. It's going to hold that temperature just like
25:09 your house would be. It will shut off once it hits those degrees. Um if you want to go up with it, you just hit the arrow and we're going to bring the temperature up. When we're running the air conditioner, this is the actual unit right up here. If I open this flap, the air conditioner is just going to pour right down onto the ground. If I close the flap, that's when it feeds through the
25:34 ducts on the ceiling, so you get air throughout the whole entire unit. There is a filter up here. You will get see it kind of getting dirty after a while. You can just pop this case down, clean the filter, and put it right back up. You'll notice that maybe once a camping season.
25:53 And then coming back to the furnace or to the thermostat. If we want to go to the furnace, we're going to hit mode, get to furnace here. So the AC is going to shut off. And now we same thing. We can adjust the temperature for whatever temperature is my favorite. And the furnace will come out from below. So there's a few furnace ducts down below. You have one
26:17 underneath the couch there. It's a little black circle. That is where the furnace is located. So, you're going to get some heat coming there. And there's Say that one more time. Yeah. So, the that's the furnace comes out from below. It's the black little circle there. That's where the furnace is located. So, that's where you're going to get heat coming out of. And there's a few other ducts just like that going through the camper. So, when you have the furnace on,
26:43 you have nice heat going throughout. Um, so AC from above, furnace from down below. And then if we're done with everything, we just come back to the thermostat, hit mode again. It's going to turn it off and shut everything down. So very easy. You just hit mode till you see air conditioner or furnace. You let off the switch and you can adjust the temperature up and down for how
27:05 you want it. All right. In the bathroom, you have your toilet here. Um it's a foot pedal flush. So halfway down on the pedal would fill the bowl with water. all the way down on the pedal would open the hole and water would continuously flush out for everything to go down. We do suggest you use RV specific toilet paper and make sure you're using toilet chemical that just helps break
27:30 everything down as it goes into the tank. Um on the wall here, this is your one ground fault reset for the whole entire camper. So, if any of your outlets aren't working, this is the reset you're going to want to come to. Um, quick over here on the wall is your water heater control. So, it's very easy to work. You just have the power button. You have Celsius, Fahrenheit. So,
27:56 we're going to keep it on Fahrenheit here. And you can adjust the temperature. So, it goes to 122. That's the hottest it's going to be. And you can adjust it down by 2°. So, say 116's your favorite, you're going to let off. And your water's going to heat up to 116°. We do have a vent up here on the ceiling. This one you just pull down, open that vent lid up, and now you can
28:21 exhaust everything out while you're showering and using the bathroom. Here in the shower here, um, nice and simple. You have your faucet here to fill the tub. Um, up top you have your shower head. Nice thing on the shower head is you can turn the water off while you're using it. So, you're not wasting your hot water, wasting your tank water, and then turn it on when you're ready to rinse off. And then we have your nice standard RV sink here. That's just simple hot and cold with a plug
28:50 to hold water. Here in the kitchen, we just have your microwave here. Nice and simple, just like an at home microwave. Got your temperatures here, different power buttons. Coming down, we do have a nice light here for while you're cooking and then your exhaust fan. Remember, for the vent, you do have to open on the outside for everything to actually vent out. On the cook top here, you have
Safety note near 29:19 Cooking-appliance note: This section demonstrates propane cooktop and oven operation. Follow the appliance manufacturer’s ignition, ventilation and shutdown instructions, and stop using the system if propane odor or abnormal operation is detected.
29:19 the nice glass panel. Just make sure this does get flipped over while we're using the stove here. And then make sure this is nice and cooled down before we go ahead and put this back. Otherwise, it is nice and simple here. So, you have an on and off button. We are just going to click on. Lights are going to kick on so you know that they're working. And we're just going to turn whatever
29:44 dial, whatever burner we want to high position. And you're going to hear it start clicking. And as long as your propane's on, you have full propane, you're going to get flames coming out of there. oven. So, you have it on. Now, we're going to click oven. We're going to go to the oven knob
30:07 here. I like to open the door so I can make sure it's being lit. I'm going to turn it to pilot again. Push and hold. And it's a self ignition. You will see a little flame pop on in the very back of the oven there. That's telling you the pilot's lit.
30:25 I like to hold pilot for an extra 10 seconds or so to make sure that flame stays on. Then I'm going to turn the button to auto and I can come over here and adjust my temperature. So 480 is our temperature today and it's going to fill up with flame here and heat to that temperature for
30:49 you. And then we'll kick that off real quick. turn the power off and we would be all put away. Again, make sure this is nice and cool before we bring this glass top back down. Um, over here on the sink, again, nice and simple, hot and cold, two sides of the sink, two plugs to hold water, and then all your great storage space going around. So, on the refrigerator here, you have zero,
31:15 which is off, and then we have temperature one all the way to seven. Seven being the coldest, one being the least cold. Um, as soon as you turn it to one or seven, it will automatically turn on for you. So, you don't have to push any power button. Um, the refrigerator itself is a 12-volt refrigerator, so it runs solely off your battery. Um, your battery is being charged
31:40 when you're plugged in, the camper's plugged in, or if you're plugged into the vehicle. So, you don't have to worry about the battery dying. And then the refrigerator itself will last about 3 4 days just off the battery. So, if you don't have power hookups, you'll be just fine to run the refrigerator. You can also run this as you go down the road. So, you just turn this on, load your refrigerator up, and it will cool down as you're traveling down the road to the
32:03 campground. Just make sure you hear little click there. That just tells you it's closed all the way, and we're secured for travel. Um, coming back here, we do have your jack knife sofa. So, this goes down into another little bed. Nice and simple. This is going to lift up and just drop right down. We have a bed there. If we want to put it back up, just gonna pull here. Grab the
32:31 back. And now we're back for travel. There is looks like a little cup holder that flips down here. And all your shades are just going to be push up, pull down. So nice and easy.
32:50 We do have just your normal slide window here to get good air flow. This particular window also doubles as an emergency exit just in case. You have two red levers here. And then the window is just going to push out. It's on a hinge so it just flips up and you can jump out if you need to.
33:20 And like I said earlier, you have click on lights throughout the camper. So you have the main ceiling lights and you have some few other lights that you can just click on by hand. Your table does also go down into a bed. So this is pretty easy here. The table just has two posts underneath that we're going to lift the table off of. So you kind of wiggle a little bit.
33:41 Table pulls out. Sometimes the bars stay in the table. Sometimes they stay in the floor. The bars are the exact same on both sides. So, it doesn't matter which part goes in the table and which part goes into the floor. But, we're going to remove these bars from the table top. And then the table itself is just going to sit and sit down on these black blocks. So, flip these cushions
34:14 up. Put that down here. You always want the rounded part out because it rides perfectly in between these pegs. So, if you do travel this way, it doesn't slide out at all. But now we have the table flat and we're just going to go ahead and fill in with all of the cushions. And now we have another bed. So, you have three beds in here. The main one,
34:43 the table, and the couch can all go down to beds. Do you want me to show how it goes back up? Uh, sure. And then when you're done camping, or done using it as a bed, I should say, we're just going to move these cushions again. I always find it easier to flip them up. Table lifts out of its spot. And these bars, again,
35:10 doesn't matter which side goes down or up. I like to put them in the floor first. So, we're good to go there. Again, rounded side out. And now we're just kind of guessing for a little bit. Set it on top. Then get down below and just make sure the table brackets go right into the table.
35:37 And now we're secure. Again, you can travel with it up or down. Does not matter either way. In your compartment here, we have your radio. So, we're just going to power that on.
35:56 It does have Bluetooth, so you can connect your phone to it, play your own music, adjust the station back and forth, whatever station you want. Um, you have zone one and zone two. So, right now, zone one is on. It's illuminated blue. The music is inside the camper. Turn one off, it turns red. If I turn two on now, it activates those outside speakers
36:26 underneath the awning. And again, that one's blue. Or we can turn them both on at the same time and have music inside and out. So, it just illuminates them blue, tells you up on the screen which ones are on to go back and forth from inside to outside. Volume adjustment. You have AM/FM, USB plugin, and an HDMI connection. And again, you got the Bluetooth there.
36:51 When we're done, you're just going to push once for mute and we're going to hold to turn it off all the way. Um, there is also a remote for these radios, too, which will be in one of these drawers. Quick, over here in the corner, you can mount a TV on the wall. So, they're going to put a sticker right here. It's there's a big backer in the wall. It's a 12 by 12 backer. So,
37:18 it's not exactly where that sticker is. You'll feel nice stable wall. You can mount a TV right there. Any mount will do. Um, if you want a swivel mount, they do make mounts that lock into place so it's not banging back and forth while you're traveling. Um, other than that, just mount it up there. Plugins and your cable connection is right up there in the corner. You will notice you have a big hole up there. That is your 12-volt outlet. So if you got a 12-volt TV, if you do a
37:46 lot of camping without electricity, you can get a 12-volt TV. So you can still have TV without having electricity. And really last thing is in the bedroom there. Very easy here. Um same shade, same windows. We do have another emergency exit. This one's a little bit smaller,
38:09 but this screen does slide over in case you do have to get out of there. You can mount another TV here in the bedroom again with that big backer in the wall. And then your plugins up here on the ceiling. And the nice thing here is this bed does lift up. We have shocks and you have a whole another big storage compartment here.
38:35 Few more click on lights above here. These will not be with the switch, so you do have to click these on and off by hand. We do have outlets on both sides of the bed for charging phones, plugging anything else in while you're going to bed. And then inside we have
38:59 shelving on the right side and we have a hook a hanging rack here on the left side. This and pretty much every other camper these days is wired for solar panels. So you'll see this sticker on the wall. Um the roof is wired for solar panels. So you can get solar if you were to start camping a lot without electricity. you want to keep your battery charged, you can get
39:24 solar panels for the roof. Under the refrigerator here in the cabinet, we do have your converter. Just push that. It's going to pop down open. You're going to have your resettable breakers
Safety note near 39:33 Electrical-panel note: This section identifies breakers, fuses and the converter. Electrical diagnosis or repair can involve shock or fire risk; use the labeled panel information and qualified service when needed.
39:36 and your fuses. So, if things go wrong, this is where we're checking. Um, we do have the ground fault reset. So, that's for your outlets, but this is going to be for pretty much everything else. You have 15 amp fuses, 30 and 40. I would just make sure I have some fuses on hand just in case you need to replace them. We're ready to go. You will hear the fan inside here. That's just keeping
40:00 the converter cool. This does get dusty over time, so just make sure we clean that out every once in a while. And then on the front side, you will notice it says auto detect. What that means is if I ever put a lithium battery on my camper, instead of having to go get a brand new converter, this one will autodetect to have a lithium. So, you can run whatever battery you want on this camper. Thank you for doing the walkthrough with me on the 210QB. If you have any questions,
40:25 contact Hilltop and me or someone else will help you with all the questions you have.
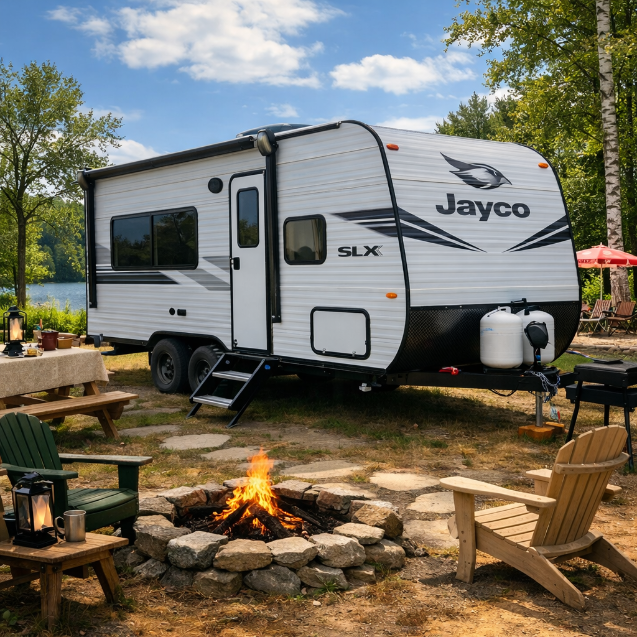 |
Built for Two With No-Slide SimplicityThe 2025 Jayco Jay Flight SLX 210QB is an excellent couples camper designed for comfort, simplicity, and stress-free camping. With no slide-out to manage, owners enjoy easier setup, lighter towing, reduced maintenance, and dependable travel trailer convenience. Need room for visitors? The flexible layout also works well for the occasional guest, making this a smart choice for couples who want practical sleeping space without moving into a larger camper. This full demonstration helps you learn the features, systems, and everyday use of the 210QB. |
What the 210QB Demo Covers
Couples ComfortQueen bed area, dinette seating, kitchen layout, bathroom space, storage, and everyday livability for two. |
No Slide BenefitsSimpler setup, easier towing, fewer moving parts, less maintenance, and faster campsite arrival readiness. |
Guest FlexibilityExtra sleeping space and flexible interior use when friends, grandkids, or occasional guests join the trip. |
Helpful for Similar Lightweight Campers
Even if you do not own this exact 2025 Jayco Jay Flight SLX 210QB, this demonstration may still help if you have a similar Jayco travel trailer, a nearby model year, or another no-slide couples camper with comparable systems and features.
Ready to Learn More?
Browse inventory, explore more demonstrations, or contact Hilltop Camper & RV today.
Browse Inventory More RV Demonstrations Contact HilltopAI-generated image for illustration only. Actual unit appearance, features, and options may vary. Verify details with Hilltop Camper & RV.