


2026 inTech Aucta Sycamore Full RV Demonstration
See how the 2026 inTech Aucta Sycamore works with this complete RV demonstration from Hilltop Camper & RV.
Read the Full Video Transcript — 2026 inTech Aucta Sycamore
2026 inTech Aucta Sycamore — Full Transcript
Read the complete Hilltop Camper & RV walkthrough of the 2026 inTech Aucta Sycamore, including the exterior cooktop and powered cooler, storage, bunk and desk configurations, towing equipment, water and waste systems, awning controls, interior monitoring, sleeping areas, bathroom, kitchen, climate controls, electrical equipment and everyday owner operation.
Equipment and safety note: The complete spoken transcript is preserved below. Safety/context notes are added where the video discusses equipment or procedures that can vary by RV or involve propane, towing, water pressure, hot-water equipment, waste systems, stabilizers, roof access, awnings, electrical service, furnace operation or propane-fired appliances. Always verify procedures, capacities, ratings and maintenance intervals in the manuals for the exact RV and installed components.
0:06 All right. Today we are going to do a walk through on the 2026 inTech Aucta Sycamore. I'm going to walk around the outside of the camper first, show you all that stuff, and then do the same thing on the inside. We are just going to start here on the back corner with your outside cooktop and refrigerator cooler.
0:27 So, we have a latch here which will unlatch the drawer and pull that out. Um, we do have the cook top here. It's just not located on here, but it is your flat cook top. Um, if you look right
Safety note near 0:44 Propane connection note: This section discusses an exterior propane connection for the cooktop. Propane connections are equipment-specific; follow the exact inTech and appliance manufacturer instructions and use qualified service if anything appears damaged or leaks are suspected.
0:44 back here, you have a propane connection that is already connected to the cook top here. And then we have your quick connect fitting right down here. So, we're going to push that back. push that into the hole and that's going to lock up the propane connection. And then we do have an onoff button. So, we're going to just open this up and that's going to run off the front
1:08 propane tanks you already have. So, you don't have to bring your own propane tanks with you. In here, there is just a buckle just to keep this secure for sure during travel. But we have your cooler. This is a powered cooler. Um, so you can, you know, obviously it's going to run. You don't have to put ice in here. You have just a normal power
1:32 cord and there is a plugin back here. They do also provide you with a 12-volt outlet because this cooler can be taken out. You can bring it to the beach, connect it to your car, but it does not just have to stay in this compartment here. Oh, we found the outlet. There it is. There we go. in this
1:56 box too. There's a box inside there. They do give you handles that screw to either end of here. So, if we are taking this to the beach or taking this somewhere else, we have nice handles for it. Um, and then your onoff button is tucked in on the back side here. It's just on and off.
2:13 And we can adjust the temperature up and down. So, we have our power cooler there. Um, right here, this is a nice door for your bunk area. Um, it does have a magnet over here so it's not flopping in the wind. Um, the big thing about this door is this whole bunk flips up, which we'll show you inside, but now we have more compartment space. So, we can put bikes in here,
2:39 um, whatever else. Or this does turn into an office space, which again, I'll show you inside. Now, we can have this door open and just have good air flow while we're at the campsite working. Um, so again, here's the magnet for the door just so it's not flopping in the wind. And then we have a couple outside plugins for whatever I choose to plug in out here. On the camper itself,
3:04 we do suggest to get a bearing pack about every 4,000 miles, every 3 to 4 years. We don't hit that mile marker. Um, we're just replacing the bearings, the seals, the grease. Um, just to make sure everything's moving the way it's supposed to in those axles. Um, so keep that in mind. Uh, really for any travel trailer. Um, we'll cut, you got outside lights everywhere. A big, uh,
3:27 Girard awning. We'll we'll bring that out inside. Um, LED lights. We'll show you all that inside the camper. Um, we will show you the steps now. So, these are down. When you are traveling, they just flip up into the door and you have a latch right there. And then we get to the campground. We're just going to release the latch. We can pull pins on either side and adjust the feet up and down.
3:55 So, no matter how unlevel the ground is, we adjust the feet and they're always nice and stable when we put them down. We'll come here. This main door um has a magnet up top here. So, same thing. So, when we're just using the screen now, the main door is not flopping back and forth from the wind.
4:17 That just closes right up. We do have a nice shade on the window that just goes up and down like the rest of your windows. Coming up here, this is your full pass through compartment space. They do give you a cover for the front window. It just buttons on up here. That is a travel cover. Um it is an
4:39 automated integrated windshield. Um, but it's just extra extra uh protection for that window while you're traveling from rock chips or anything like that. Um, up front here, you do have two 20
Safety note near 4:53 Propane-system note: This section discusses the propane cylinders and regulator. Follow the regulator and inTech instructions for the exact installed system.
4:53 lb propane tanks. Those would be filled and ready to go for you. Um, they're just turning on on top just like your standard grill tank would do. And then right here is the selector. So, I'm going to turn it to this lefthand tank right now. meaning it's going to draw from that tank first. As soon as that tank runs out, this will turn red like it is. And if your second tank is open, it will
5:20 automatically start drawing off the second tank. There's really no right or wrong way to do it. You can open them both. Pick whatever one you want to first. I personally like to leave one closed so when I when it is empty, I know that it's empty. But again, no right or wrong way on that one.
Safety note near 5:37 Towing note: This section discusses the coupler, chains, 7-way wiring and breakaway equipment. Verify the exact tow vehicle, hitch, brake-controller, trailer ratings and legal requirements before towing.
5:37 Um, you will see a plate here on the A-frame. What this is for is if you decide to get an equalizer hitch, which is really suggested when you're traveling with something. Um, these are for the equalizer bars. It's just an extra uh plate here for security on the A-frame.
5:53 And we have our lip tongue jack. So, we have a little onoff for a light right here forever hooking up at night. And then just simple extend and retract for hooking up and disconnecting. Very nice and easy. And up top here, if this jack stops working for whatever reason, we can pop this cap off. And the same crank that I'll show you to use for your stabilizer jacks,
6:21 you can also pop this cap off and crank this up and down by hand. So, we're not just stuck somewhere if this stops working for whatever reason. Um, we have your two chains here that we hook to the vehicle while we're traveling. Your 7-way power cord, which will get your lights and your brakes and everything you need again while traveling. It'll also charge your battery.
6:44 Um, this particular camper is a 2 and 5/16 ball. And this is what locks the ball down. So, that would be unlocked while I'm hooking the camper up. And then when I drop it down on the ball, just going to push that close. And that's going to lock the ball into place. And it is smart to get a pin that goes through this hole for traveling just so this can't pop off at
7:07 all while we're going down the road. And then you will see a breakaway cable on any camper, any travel trailer or fifth wheel. Always make sure this is hooked to the vehicle. I hook it right to where I hook my chains on the loops of my of my truck. This is for whatever reason. If the camper came disconnected while you were traveling, this cord yanks out from a box underneath the
7:31 uh A-frame here, and that just seizes up the brake so it's not just flying down the road. Um, hopefully that never happens, but just make sure this is hooked up all times during travel. We will come around here to the off side of the camper. Um, just the other side of the compartment. It is a 50 amp unit. This is the power cord that
7:55 would come with the camper. I'm using my own power cord today. And just right next door, this is just the vent for your battery. So, nothing you have to do here. The batteries are just inside located. This is the vent here for that.
8:12 We look underneath here. This is where you would store your sewer hose. So, that just opens right up. Sewer hose can store in there very nicely when we're not using it. Um, if you get a sewer hose with a little elbow on it, you just have to take the elbow off, but the rest of it will fit in this uh the tube here for you.
8:37 Right here, this is where we're going to fill our onboard fresh tank or just hook to city water if I'm going to a campground with full water hookups. We'll start with this the freshwater tank here. So, if I'm going somewhere without any water hookups, I can fill up a tank underneath the camper that holds water for me, so I can still have water. Um, you could just dump a bucket of
9:01 water in this hole if that's all you had, or you could fill it with a hose at a fillup station. Once this tank is full, there is an overflow tube underneath. It will just start pouring out onto the ground so you know that it's full. or you have a monitor inside that I'll show you that reads empty one/irds 2/3 and full so you can stop it at a certain level or know when you have to refill that up. So that's your onboard fresh tank if you're going somewhere without water. Right next
9:28 door is your city water connection. So if you're going to a campground with full water hookups, your water hose will just screw into here into the fixture at the campground. Turn it all the way on and we'll have constant water every time you flush a toilet or turn on a sink. Um, one thing we do recommend is a water pressure regulator. It's just a little brass piece that you can screw to the
Safety note near 9:50 Water-pressure note: Campground water pressure varies. Use the RV/plumbing manufacturer guidance for acceptable pressure and compatible regulators.
9:51 hose and directly into the camper or screw to the fixture at the campground. Um, what that does is just make sure no water pressure gets above what this can handle. Um, which is 50 PSI. So, again, it's just kind of a piece of mind to protect the camper. I would definitely recommend to get that
Safety note near 10:06 Water-heater note: This section discusses a Suburban tankless water heater, including exterior controls, fuse and pressure-related components. Hot-water systems can involve heat, pressure, propane and electricity; follow the exact water-heater and inTech instructions.
10:06 water pressure regulator. Here is your the outside of your Suburban tankless water heater. Um, it is tankless, so that is nice. You're going to get more consistent hot water. Um, you're not doing a whole bunch out here for the water heater. Um, you're really adjusting the temperature inside the camper, which we'll show you. You do have an onoff switch out here. This switch, it's on right now,
10:29 which is going to activate the panel inside to turn it on and off and adjust the temperature. If this switch is off, that panel inside is also off. So, just make sure this switch is on. The rest of it's done inside. You can use really keep that on during the camping season. There's no need to turn that on and off. There is a 7 amp glass fuse in here. Um, I would have one of those on
10:56 hand just in case uh if the water heater is not working. That's just the first place I check is that 7 amp glass fuse right inside here. And there is a pressure release right here. So, if I open this up, that's going to release the pressure. It's also going to drain the water out of the water line going through the tank. Again, it is tankless. Um, but if I'm not going to camp
11:21 for a little while, I like to open that release, just get the water out of the water line there, just so it doesn't sit in there and get all stagnant and smelly if I'm not using the water. And this just closes up. And this does get hot when you're running the water heater, so just be careful here if you're on the off side of the camper. And next door is
11:44 the exhaust for your furnace. Not doing anything here. This again does get hot when you're running the furnace, so be careful. Um it is something that gets clogged up with bugs here and there. So there is bug screens you can get for these to protect against that. Just so when you fire it up, it lights perfectly for you.
12:03 power cord. I am using my own power cord today, but yours is going to be the same concept. It's going to go right in here. You kind of turn and twist. And on the one that comes with the camper, there is a collar that screws right onto here just so it's nice and secure. So, if someone trips over, steps on it, it's not going to pull out of the side of the camper. Um, again, this is a 50 amp camper. I am actually adapted down to 30 amps out here, which you can definitely do. So,
12:33 um, so if you're getting this camper, I would get an adapter from 50 to 30 just cuz you might get a campground that doesn't have 50 amp hookups and now we can still plug it into a 30 amp connection. Right above, this is your cable connection. So, if you go to a campground with cable hookups or if I get a portable satellite, that's what I would connect that to. Either way, you do have an antenna on the roof that's going to pick up local channels for you
12:58 in both places. So, if you don't have anything connected to that, you still should get some local channels. And then right above is for a portable solar panel. So, there is roof mounted options or if you wanted a portable solar panel, you could plug it into here, set it out in the best sunlight, and that's just going to keep your batteries nice and charged.
13:21 Now, underneath here, We do have a hose hookup. So, this would be for, you know, you can hook a hose to here and have full water to rinse out your sewer system, rinse out things on this side of the camper. There is a valve up here to actually turn this on. So, right now, it's off. So, I'd have no water coming through here. I can turn this on. And now,
13:48 I'd actually have water coming through here. So, I can use my hose spet. And then this drain down here, this would drain any excess water in the line here. It's also going to drain
Safety note near 14:00 Waste-system note: This section discusses sewer connections, black- and gray-tank draining and flushing. Follow the RV sanitation-system instructions and campground procedures, and keep potable-water equipment separate from waste-system equipment.
14:00 my onboard fresh tank to get all the water out of the tank when I'm done using my fresh tank. And now here is your dump station. So this is where we're going to dump your gray tank, which is just waste water. That is just soapy, dirty water from your sink and shower. And then over here you
14:23 have your sewage tank which is your toilet tank. They both come out of here. You have the cap here. Pops right off. So that is just for travel just so it's not getting all dirty. But your sewer hose will connect just like this cap does. Push it on. Turn and twist so it locks on these
14:46 notches going around. I would drop my sewer hose into the dump station. And then I would come here and I want to pull this lever out and dump my black tank first. When my black tank is empty, I'm going to push this closed and pull and dump my gray tank second. And that's the reason I do that is just going to rinse out my sewer hose because that is just again soapy,
15:12 dirty water for my sink and shower. One thing I do like to recommend is for the black tank, it is good to dump that as full as possible. Um, you do have a monitor inside that tells you how full the tank is. It is a gravity dump, so the more filled up it is when you pull that valve, it's just going to push everything out 10 times better and keep it nice and clean for you. Um,
15:37 so if we check our monitor, my black tank's not full all the way. If I have enough water to do so, I just flush my toilet, fill my black tank with water the rest of the way, and then come out here and do my dumping process so everything flushes out nicely.
15:54 Come in here. So, this is the crank I mentioned for your stabilizer jacks, which you have on all four corners, or for your power tongue jack up front. If it stops working, you would use this
Safety note near 16:05 Stabilizer note: Stabilizers are for reducing movement after the trailer is level, not for lifting or leveling unless the manufacturer specifically permits it. Follow the exact stabilizer and inTech instructions.
16:09 same crank to make that go up and down. Um, so for your stabilizer jacks, they are just for stabilizing, not for leveling. So you want to level the camper first. Front to back leveling with your tongue jack, just up and down. Side to side leveling. If it's uneven at the campground, you have to drive up on some blocks wood or links levelers to level side to side. Once you level the
16:35 camper, then we're going to come here and crank these down. I would have a block of wood or again a lynx leveler underneath this. Most campgrounds are just dirt or gravel, so you want it to go against something instead of just on the ground. We're just going to sit here and crank this down.
16:57 Once it hits the ground or the block of wood, we're just going to snug it up. And that just so snug that up here. Once you hit all four corners, that just keeps it nice and stable. So, when we're walking around inside or it's windy day, we're not getting rocking back and forth in the camera. It is also a 3/4 drill bit. So,
17:20 if you have a cordless drill, you can zip them up and down by hand. Um, right here, just where the license plate's going to go, little license plate light. Tucked underneath here, you do have an accessory receiver. Um, carrying capacity of 175 lbs. So, that's nice for a bike rack or a tray or something back here, so you don't have to store everything
17:43 inside. You have that nice accessory receiver back here. And then up top here, that black plate, uh, you are prepped and ready for a backup camera. So, all the wires are there. If you ever got a backup camera, it's just a lot easier install since it's all ready to go.
Safety note near 18:01 Roof-access note: This section discusses roof inspection and seal maintenance. Roof access can involve a fall hazard; follow inTech’s approved inspection method or use qualified RV service.
18:01 And then last thing is on the roof. We do suggest you peek up on the roof a couple times a year. Um, it is a nice fiberglass roof, so it's a lot easier for you to maintain, but there is seals around all your vents up there. So, peek up there, check your seals. If you notice any cracks in the seals, um, just get those resealed back up with some self-leveling sealant. That just makes sure
18:24 there's never water inside the camper. So, right when we get inside the sycamore here,
Safety note near 18:30 Awning note: Wind and storms can damage an RV awning quickly. Follow the Girard awning manufacturer’s operating limits and retract it whenever conditions are unsafe or the RV is unattended.
18:30 we have kind of your control panel. Um, so first off, we're going to do the awning, the nice Girard. It's an automatic awning. So, it's just as simple as awning. You see in, stop, and out. If I want my awning out, I'm just going to push out here. and the awning starts coming out automatically. Say for whatever reason there's a tree or something in the way, there is this
18:54 stop button right here. I would hit stop and the awning just stops exactly where it was located. Otherwise, I'm going to go back to hitting out and just let this continuously go out for me.
19:09 This does run on your battery, so you don't have to be plugged in for this to work. So, there we go. all the way out on the awning. Also, back up on this panel here, we do have an LED on. So, if I click that, you'll see the nice LED light up front there. And that can be on or off, even when the awning's in. And then there's the off button. And then there is the button
19:36 that says close. So, if I hit that, that would automatically turn that light off also. and then it would bring the awning back in. Once it's in, there's no locks or anything. It puts itself away and we're good for travel. Just be careful with the awning if it's rain or if it's windy or storming outside. I would just have it in just to be safe. [Music]
20:05 So, that was your whole awning panel right there. Labeled really nicely. Very easy. Right next door, this is what I was talking about your tank levels. So empty, 1/3, 2/3, and full. So if I hit battery up here, my battery is fully charged right now. My onboard fresh tank is empty. Black tank is empty. And we have the gray tank here is got a little water in there. It's a 1/3. So that's
20:32 where we can check all of our tank levels and our battery level to know to fill tanks or empty them. Right underneath is our water pump button. What that is mainly used for is your onboard fresh tank. Because you're filling it up, it's just sitting underneath the camper. We want it to pressurize and get siphoned out of that tank. So, we're just going to flip the water pump switch on,
20:54 which is going to suck the water out of the tank and disperse it through the water lines to actually use in our sink and shower and toilet. If we are hooked to a water hose, that is already pressurized. There's no need for the water pump. Again, that is just for your onboard fresh tank.
21:13 And then next door is tank heater. So, all your tanks have a heat pad on top of it. So, if we're camping late in the season, maybe early in the season, and it's cold outside, we can turn the tank heaters on, which will keep our tanks from freezing um usually overnight. um if it's below freezing for more than 24 hours, even though you have tank heaters and this one
21:37 actually has a line heater, too. Um we do still suggest to just be careful with the water if it's staying below freezing for more than 24 hours. Um so tank heater and again this one has the line heater too. So your water lines are also wrapped in heat pads. Um so that will allow you to have water in the system a little longer than most people. Again, just be careful with that.
22:01 And down below is our radio. Um, so you have AM/FM, USB hookups, Bluetooth, and we have the power button right up here in the corner. And you'll see we have A, B, and C. Those are the different zones. So you can fade the music from inside to outside to back and forth inside the camper here just by hitting A, B, and C, choosing where I want the music to go. Again, USB plugins, auxiliary
22:30 cord hookups to hook up phones that might not have Bluetooth, and then HDMI. All right, there. If you quick look on the wall here, you'll see different light switches throughout the whole camper. We have ceiling lights, accent lights, porch light, which is the outside lights, and then there's a nice exterior light on the front of the camper, which is all turned on from here.
22:52 And as you see, it's illuminated blue to tell me that what switches are on. Um, we'll come here to the nice sitting area. Um, as you walk in the door, you do have a table located right here for storage. This just disconnects and we can put the table right here in the middle. So, we have a nice sitting area. Um, and we can eat there. Otherwise, it just latches for travel and we can just use
23:18 it as the couch or this does go into another bed. These drawers just pull right out here. And all we're doing is lifting up on these cords, pulling up. That's going to drop into place.
23:38 And now we have another bed. So nice and easy and very easy to put back away and the drawers push back in. Quick 15 seconds in the morning, you're back to normal. Um, here is a big emergency w uh exit window, I guess. First off, we have the nice roller shades
24:00 and then those just pull down and go right back up. If we did have to jump out of here, the screen just pulls right out. And we have two window latches here. So, we got one, two, and the windows on a hinge so you could flip it up and jump out if needed. Or you can go to the center
24:23 and it does just latch open. So you can have just a normal window. It's not just an emergency exit. That comes in. There we go. That's put back away. Um on either side of the couch you have a couple reading lights. So they're just touch. If you touch here, you got the back light. Touch here,
24:45 you got blue up here. And then touch it again. And now it is just your standard reading light. Um, you'll see down here you got some speakers throughout the camper. That's for the fade inside and out. Um, this is your CO2 detector that is wired in. Um, so over time, 5 to seven years, you will have to replace this. It
25:08 will beep at you four times to let you know it's time to replace this. Um, coming back here, this is where we saw on the outside the nice door. So, right now we have the bottom one down to a bunk. We can also drop this top one down for a bunk, too. You got the nice handle and that just pulls down with the shocks. So,
25:32 now we have the whole bunk bed system with plugins, USB. You can probably you can put a little TV up here mainly if you have the plugins there. And then if we want to turn this into kind of the office area or put bikes under here, we can lift this back up.
25:54 And then this is going to just got the string right here that's going to pull up here, lock into place. So we have this spot right here to sit and then we have the latch here to unlock this. And that's going to pull down. So, we have a little desk area and then this does fully extend so we can really lounge out and get some work done while we're camping. It all pushes back away. Make
26:23 sure this gets latched for travel. And we could leave this up during travel cuz it is locked in down here to release it back to the bunk. We do have a lever right underneath here. So, we're going to pull that. And now it's going back down to the bottom bunk.
26:45 We'll step into the bathroom here. Huge bathroom. Bath light switch right on the ceiling. Right here we have your crank open vent. And then up here in the corner is actually where we're going to turn that vent fan on just to circulate some air for showering in here. Um,
27:07 you do have a outlet in the bathroom. This is also your ground fault reset. Your GFCI for the whole camper is located right here. So, if any of the outlets aren't working, this is where we're coming to check. Your Dometic toilet. So, it's a foot pedal flush. So, halfway down on the pedal would fill the bowl with water. all the way down on the pedal would open the hole
27:34 and water would continuously come out to flush everything down. We do suggest you use RV specific toilet paper and RV toilet chemical. Um the toilet paper just breaks down easier and then the toilet chemical every time I go to the campground and I start with a fresh empty black tank. I want to either pour some liquid chemical down or they make little pods. Either way works. You drop it
27:58 down the toilet into the tank, mix it with a little bit of water, and that just helps break things down and helps with smells as we're using the tank and then keeps it nice and clean for us. Storage, you will notice ducks down towards the floor throughout the camper. Those are heat ducks. And then in here is the shower.
28:24 Um, we do have a light switch on the wall, waterproof light switch there. And then the same crank open vent and then the button up here to turn the fan on just like in the bathroom here in the shower has the same one. So big shower, nice little seat there. And then your shower nozzle. So while we're camping, say I don't want to use all my water or waste all my hot water,
28:50 I can turn the water off while I'm showering. Then when I'm ready to rinse, I can turn it back on just so it's not constantly coming out wasting all the water. [Music] All right.
29:09 So coming here, we're at the refrigerator. Freezer refrigerator. This is a 12-volt freezer and refrigerator, so runs solely on your battery. Um, very efficient. Does not take much battery power. It only takes about one hour to fully cool down.
29:28 So, definitely run this as you're going down the road because your truck's charging your battery. When you're plugged in, the camper's charging your battery. So, you don't really have to worry about the battery dying from the refrigerator. And tucked in at the top here, this is how you turn it on. So, right now, we have the little arrow pointing down. It's on zero, meaning off. And if we just keep scanning through, we got one, two, three, four, five, and six would
29:55 be the coldest. So, I'm on six right now. The refrigerator's turning on. Six is the coldest. That's what I would personally have it on when I first turn it on just to fully cool down. And then if you want to dial it back, you can just dial it to whatever number you choose and it's going to stay on for you. And then you want it off, you just turn it right back to zero. That's going to
30:17 cut all power to the refrigerator for the storage process. And make sure we have a click there. That just tells me it's shut and latch shut for travel. Um over here, plugins. Kitchen accent light up above top there. Um looks like we got USB plugins. We do have another fan up here on the ceiling. And
30:44 instead of having to crank this one up and down, we do have an automatic button here. So I can hit fan on. It's going to open automatically. If you notice up here too, it has the little umbrella. It has the rain sensor on it. So if it starts raining, it will close automatically. And then back to the on and off button. Um it has fan on 1 2 3 and four. So the more times I click it,
31:11 it's the fan's going to get a little faster. four being the most, one being the least. And then when I'm done, I can do fan off and it will just automatically close on its own.
31:28 Um, nice spray hose on the sink here. Um, as you see, your TV is pulled out right now, so you have a nice entertainment center, but then you can push this closed, get the TV totally out of the way. You have another latch right here for travel, just like that back office area. So, make sure that's just latched up so it's not banging back and forth during travel. And then we have that same emergency exit that we had
31:55 over on the couch side on this side also. And again, it does latch for the normal window.
Safety note near 32:02 Cooking-appliance note: This section demonstrates propane cooktop operation. Follow the appliance manufacturer’s ignition, ventilation and shutdown instructions and stop using the system if propane odor or abnormal operation is detected.
32:02 Right here is our Dometic cooktop. So, this just flips over, kind of acts as a splash guard. Um, it is self ignition, so it runs on propane only. So, make sure our propane's on. We're going to turn this dial to light, which it shows me it's running the left burner here. And then I'm just going to sit here and hold the spark. If I had propane on, the flame would fire up right away.
32:29 And then we can turn it to high or low and do whatever cooking we want to do. And same thing with this burner. Turn it to light. hold my spark here and the flame will pop up. Um, the first thing I like to do is if I'm going to use any propane, I like to start my burners first just to get the propane flowing through the camper. That tells me I got good propane when the
32:51 flame pops up here. And now everything I use on propane is going to fire up right away. Um, so you don't have to do that. It's just a good way to get the air bubbles out of the propane lines is with your cook top here. Um, if you are cooking here, just make sure this is cooled down before we put the glass top back down. And then down below here, this is kind of a microwave oven,
33:14 multiple different things. So, you can just open this up, use it as a normal microwave where you type in your 30 seconds, warm something up, pop some popcorn, or we have the convection setting, so we can actually preheat this to 300, 400° and cook and bake whatever we can fit inside here. Um, it works really well. Um, it's an electric. Um, and it's all located up here, so frozen foods,
33:41 broil, you got all kinds of different settings on there. Um, but it works awesome. storage everywhere. Oh, looks like we got remotes. T, all the TVs are smart TVs, so that's nice. If we have Wi-Fi, we can get all of our apps on the TVs. And then then there will be a remote for the radio I showed you right when we got inside. Um, so you can do everything from the radio or with the remote here.
34:10 I am going to dial back to the wall here. So, we have a thermostat also. So, this one does have two air conditioners. That's why there's 50 amps for the plugin. If we do adapt to 30 amps like I'm doing out here, it is suggested you just run one air conditioner so it's not drawing so much power. Um, but it's very easy. So, it's off right now. If I click this button, off's going to
34:38 start blinking. So, now I can turn the dial to cool. So, I'm on air conditioner right now. So, then I'm going to hit the button. We have fan high auto and fan low auto. I'm gonna choose high auto. That's going to hold my temperature. So, I'll hit that. I can adjust the temperature.
34:59 So, 52, that's what we're rocking with today. Um, the air conditioner, it's this one's first. Their other thermostat is in the bedroom for the second AC. I have these flaps open right now. So, the AC is just pouring out right here. If I close them, then it's going to feed through up here kind of in the duct system to run through the whole camper. And then you will notice you have two
35:27 filters up here. They're nice and clean and black right now. You'll see them getting a little dusty. Pop them down, clean them, and put them right back up. They're reusable filters. And then we'll quick go back to the thermostat. If I don't want air conditioner anymore, I'm going to turn this to heat. Click heat. And then again, adjust my temperature up and down. Your heat is propane
Safety note near 35:45 Furnace/thermostat note: This section discusses climate controls and propane-fired heat. Follow the furnace and thermostat manufacturer instructions for the exact installed system.
35:52 only. So, make sure you have good propane. That does draw the most propane out of everything. So, if I am doing later season camping, just make sure I have nice full propane tanks. And then the heat's going to come out anywhere down towards the floor with these black circle ducts. And then it's actually furnace is actually located right here. So you'll get some heat coming out of there. And then when I'm fully done with everything, back to the thermostat. We're just
36:19 going to turn that to off. Off. And it's going to shut down. The furnace usually takes a good 35 45 seconds for that fan to stop running and then it will fully shut off for you. Coming back towards the bedroom here. Just good storage area. Drawers going all the way down.
36:41 This is for your microwave in there. Microwave and cooktop. Kind of the turntable that you've seen. Soft clothes. Everything. Drawers and cabinets are all soft closed.
36:58 Close that up. And now into the bedroom area. We do have a sliding door here. It does have the latch. Make sure this is latched at all times during travel so it's not banging back and forth. Otherwise, it lifts up. And we have the nice privacy door here.
37:20 Um, coming over here on this wall, we have another thermostat. So, I it's the same exact thermostat as I just showed you. So, I'm going to click that. We'll go to cool. Same concept. And then that one is just located right out here. And same thing,
37:42 we have the straight dump system or if I close it, then we have the duct um up here that it's going to feed into the bedroom with.
37:57 Turn that off. For now, we have another Max Air vent also in the bedroom. So again, same thing I showed you in the kitchen. If I turn on the vent above the bed's going to open automatically. Also has the rain sensor.
38:19 And then we can pick and choose our speed just by hitting 1, two, three, and four. Um, light switches, ceiling light, accent lights, and more accent lights here. So, light switches throughout the camper. Nice bed here with storage underneath with the shocks to hold it up. That is where our battery is located. So,
38:48 that's where you saw the vent on the outside of batteries ever needed to be replaced or you wanted more batteries. These are just all located underneath the bed here. And then looks like two more windows. Again, latch open. They are all emergency exits again, just like the ones I showed you before. And we have plugins and USBs on both sides of the
39:12 bed. Um, ceiling lights and the accent lights you can turn on and off from over here also, so you don't have to get up and turn them off on the wall. And the same style reading lights you saw by the couch there. And we do have the roller shade to come down over the big window. So when we're going to bed, we can keep that light out. Smart TV on the wall there.
39:41 And then one quick thing I wanted to show you back out here in the living room is in this cabinet. We have first off the the main power switch. So when I have my camper in storage, even though I have all the lights off, there's still a few things in here they call phantom draws, little lights that just kill my battery. So what I can do is just t shut that off. That cuts
40:08 all power to the camper. So when I'm in storage, it's cutting all power. So when I come back and I'm ready to use it, I can turn it back on and my battery still should be nicely charged because I
Safety note near 40:19 Electrical-panel note: This section identifies breakers, fuses and the main power switch. Electrical diagnosis or repair can involve shock or fire risk; use the labeled panel information and qualified service when needed.
40:19 had that shut off while it was in storage. And here is all your resettable breakers and fuses, which are labeled down here on a sticker. So, pretty much besides the ground fault reset in the bathroom and that 7 amp glass fuse in the water heater outside, something's going on.
40:41 This is where I'm coming to either reset a breaker or replace a fuse. Um, you're running pretty much all 15 amp fuses, couple 20s, couple 30s, and some 25s. Just have some of those on hand with you so it's easy to replace if something does go off. And then this converter is lithium ready. So, if I ever chose to get a lithium battery, instead of having to spend a bunch of money
41:05 on a new converter, all I do is I have to flip a switch inside there and now it runs on a lithium
Safety note near 41:10 Water-heater controls note: This section demonstrates the tankless water-heater control panel and temperature settings. Follow the exact water-heater and inTech operating instructions.
41:10 battery. And then last thing in here is the water heater controller. So, if you remember outside you had that onoff switch. If that switch is off, the lights you see here will not be on. So, all you have to do is make sure that switch is on outside. And again, you can leave it on cuz then right here is actually where I'm turning it on and off. So, I push power here. You have
41:35 Celsius and Fahrenheit. We'll go Fahrenheit. And then we can adjust my temperature. So, it's at 122° and I can dial it back. So, say 113 is where I want it. I let off the switch. And now my water is going to heat to 113° and have nice hot water. When I'm done using it, if uh you can keep it on while you're camping the whole time, that's just fine. When I'm ready to put this away, turn that
42:01 off. That's going to cut the propane, cut the flame, and the water heaters off. And that was the walkthrough on the 2026 inTech Aucta Sycamore. If you have any questions for us, please feel free to give Hilltop a call at Fridley Rochester, Brainerd, and Alexandria. Be happy to help.
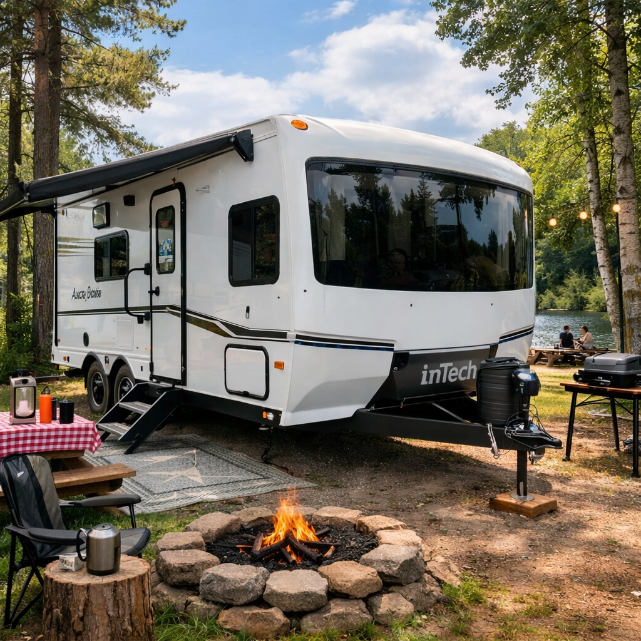 |
Cool Design, Real Function, Built to LastThe 2026 inTech Aucta Sycamore brings the cool factor right away, but the real story is how much smart functionality is built into the design. From the pull-down bunk to the pull-out bed and the pull-out desk with a view any office dweller would admire, this camper is made for people who want something different, flexible, and genuinely useful. What you do not see may be even more impressive. inTech products are built with a one-piece welded all-aluminum frame, and at Hilltop Camper & RV, inTech is the brand we carry that we see in the shop the least. This full RV demonstration helps show why the Sycamore stands out inside, outside, and underneath the surface. |
What the Sycamore Demo Covers
Flexible InteriorPull-down bunk, pull-out bed, smart sleeping options, useful storage, and a layout that adapts to the way you camp. |
Desk with a ViewA pull-out desk setup that gives remote workers, planners, readers, and road-trip dreamers a campsite office worth admiring. |
All-Aluminum StrengthA one-piece welded all-aluminum frame helps make inTech one of the most impressive brands Hilltop carries for long-term confidence. |
Helpful for inTech Owners and Shoppers
Even if you do not own this exact 2026 inTech Aucta Sycamore, this demonstration may still be helpful if you are researching inTech campers, comparing premium lightweight travel trailers, or looking for a camper with flexible sleeping, work-from-campsite functionality, and a durable aluminum-frame construction story.
Ready to Learn More?
Browse inventory, explore more demonstrations, or contact Hilltop Camper & RV today.
Browse Inventory More RV Demonstrations Contact HilltopAI-generated image for illustration only. Actual unit appearance, features, and options may vary. Verify details with Hilltop Camper & RV.